Thursday, May 1, 2014

Buttermilk Ranch Dressing

Photo by whitneyinchicago

BUTTERMILK RANCH DRESSING

This is a great salad dressing to serve to your family if they are having a hard time letting go of their favorite creamy bottled dressing. My husband lovesthis stuff and I love that it is actually really good for him. When I don’t have homemade mayonnaise in the fridge I substitute an additional 1/4 cup creme fraiche to avoid the unhealthy oils found in most commercial mayonnaise.
  • 1 1/4 cups sour cream (I save money by making my own)
  • 1/2 cup buttermilk
  • 1/4 cup mayonnaise
  • 1 tablespoon lemon juice
  • 1/2 teaspoon onion powder
  • 1 large garlic clove, minced
  • 4 tablespoons fresh chopped parsley
  • 1 teaspoon sea salt or to taste
  • 1/4 teaspoon black pepper
  • 1/4 teaspoon dried dill weed (or 1 teaspoon fresh)
  1. Combine all ingredients in a quart jar. Stir well with a fork or seal tightly and shake.
  2. Refrigerate for at least an hour before serving. Taste and additional salt as necessary. This makes for a fairly thick dressing. If a thinner consistency is desired replace part of the sour cream with additional buttermilk.
  3. This is delicious over a chopped salad with bacon, hard-boiled egg, and lots of vegetables.

How to Freeze and Reheat Pancakes and Waffles

How to Freeze and Reheat Pancakes and Waffles

  1. Cook pancakes or waffles according to recipe directions. Allow the pancakes or waffles to cool completely.
  2. Line a baking sheet with a sheet of parchment paper.
  3. Place the cooled pancakes or waffles on the baking sheet making sure that they do not touch each other.
  4. If you are freezing more that one layer of pancakes or waffles, you can simply use another sheet of parchment to separate the layers.
  5. Place the baking sheet into the freezer. Allow the pancakes or waffles to freeze for at least 6 hours.
  6. Once the pancakes or waffles are completely frozen, stack them in a zip top freezer bag or freezer-safe container.
  7. Use a marker or tape label to add the date to your storage container.

How to Reheat the Pancakes

Option 1 for Reheating Pancakes:
Preheat oven or toaster oven to 350 degrees. Line a baking sheet with parchment paper. Line the desired number of pancakes on the baking sheet and cover with foil. Bake for 10-15 minutes or until they are heated through.
Option 2 for Reheating Pancakes:
Stack pancakes on a microwave safe plate and heat on high for 1 ½ – 2 minutes or until the pancakes are heated through.

How to Reheat Waffles

Option 1 for Reheating Waffles:
Place frozen waffles into toaster and toast as you would a piece of toast. This may take more than one cycle depending on your settings.
Option 2 for Reheating Waffles:
Preheat oven or toaster oven to 350 degrees. Line a baking sheet with parchment paper. Line the desired number of waffles on the baking sheet. Bake for 10-15 minutes or until they are heated through.

Homemade Buttermilk Substitute

I prefer to use real buttermilk in recipes as often as I can. I love the flavor that it ads to recipes like pancakes and scones, but I don’t think that buttermilk substitutes are quite as good as the real deal.
What I think doesn't matter though, because sometimes something has to give. We've all been there. Mid-recipe you realize that the ingredients call for buttermilk and there’s none in the refrigerator.  No one wants to make a special trip to the grocery store for just one item, so you have to make do with a substitute.
how to make homemade buttermilk substitute
For those type of situations it is nice to have this kitchen tip up your sleeve. With common ingredients you can easily make homemade buttermilk to use in your recipes.

5 Homemade Buttermilk Substitutes

Some of these substitute recipes are easier than others in a pinch. My most commonly used method is with lemon or vinegar, but the others are helpful as well. All of the methods start with milk, so you’ll need to have that on hand.

cream of tartar

Measure 1 3/4 teaspoon cream of tartar plus 1 cup milk. Whisk to combine and let stand at room temperature for 5-10 minutes, until curdled and then stir.

lemon juice

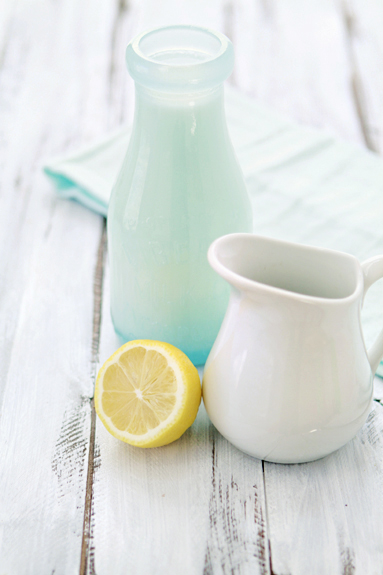
Add one tablespoon of lemon juice to a liquid measuring cup. Then, add milk until the amount reaches one cup. Let the mixture stand at room temperature for 5-10 minutes. The milk should look curdled. Stir and you have homemade buttermilk!

plain yogurt

You can easily make a buttermilk substitute with 2 tablespoons milk plus enough plain yogurt to equal one cup. Stir to combine and then use your as recipe instructs.

sour cream

If you have sour cream on hand you can easily make a buttermilk substitute by thinning the sour cream with a bit of milk until it reaches the consistency of buttermilk. Stir to combine and then use your as recipe instructs.

white vinegar

Add one tablespoon of white vinegar to a liquid measuring cup. Then, add milk until the amount reaches one cup. Let the mixture stand at room temperature for 5-10 minutes. It should look curdled. Stir and you have homemade buttermilk!

BONUS

Depending on the recipe, I have used canned coconut milk as a substitute for the buttermilk. BUT you have to use your personal discretion on this one because the flavor is certainly different, plus some recipes need the acidity of Buttermilk (or one of the substitutes) to react with the leavening agent.

Yogurt (almost) Unplugged


Written by Lynn of Cookie Baker Lynn.
Iam a sucker for kitchen catalogs, those gorgeous, glossy advertisements that come in the mail. They do a wonderful job of tempting me, but when I’m done drooling, usually I just pitch the catalog without placing an order and without longing regret.
How am I able to turn my back so resolutely on those fabulous tools, gadgets, and machines that promise to pluck the last olive from the jar, take out strawberry hulls with ease, and make baby food at the press of a button?
I've learned a valuable secret. When you buy a single purpose gadget, you not only have to pay for it, you also have to store it. Most of us don’t have kitchens as big as a barn in which to store gadgets. It’s much tidier (and cheaper) to only invest in good quality tools that serve a multitude of purposes. A set of sharp knives will take the place of hundreds of kitchen gizmos and a solid set of pans will be in use years after you've put that hinged omelet pan in the garage sale.
One small appliance that falls in that category for me is a yogurt maker. If you have one and you love it, super, you need read no further. But if you have always wanted to try making yogurt, but didn't want to buy a machine, read on.
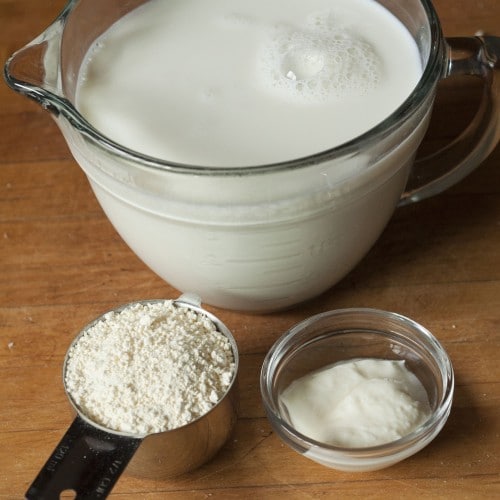
Yogurt is simple to make. All you need is milk, a small amount of yogurt with live, active cultures, dry milk powder, a saucepan, a thermometer, a quart canning jar with screw on lid, a heating pad, a towel, and a large soup pot. Most likely you already have all of that on hand. And if you have to buy a heating pad, hey, that also works really well as a heating pad!
Photo by Lynn
Plain Yogurt
  • 1 quart milk (non-fat, 2% or whole – your choice)
  • 1/2 cup dry milk powder
  • 2 Tbsp plain yogurt with active cultures, at room temperature
1- In a medium saucepan stir together the milk and milk powder. Heat to 180 deg. F, stirring occasionally. Take the pan off the heat and let the mixture cool to 115 deg. F.
2- Place the yogurt in a small mixing bowl. Pour a small amount of the cooled milk into the yogurt and whisk to blend.
3- Pour the yogurt mixture into the milk and whisk to blend thoroughly.
4- Pour the mixture into a clean, glass quart jar. Screw on the lid. Place the jar on a heating pad set to “low.” Wrap a towel around the jar and cover it with a large, inverted soup pot.
5- Incubate for at least 8 hours. I like to do this at bedtime and wake up to freshly made yogurt!
[print_link]

TROUBLESHOOTING

If your yogurt doesn't firm up, most likely you either used a starter yogurt that wasn't active, or you killed the cultures by mixing the milk into the yogurt before the milk was sufficiently cooled down. Don’t throw away that quart in disgust. Put it into smoothies or bake with it and try again!
Now that you know how to make basic yogurt, come to my blog, Cookie Baker Lynn, to see how to make yogurt cheese, and get a recipe, too!

Homemade Substitutes for Grocery Staples

Has anyone else noticed the rapidly rising price of food lately? That the usual grocery run is costing more and more? I have, and I've been comparing receipts with several other food bloggers. The results of our research has prompted us to bring you a series to help you spend less while continuing to eat well. Get ready to learn a lot and be equipped for the rising costs of everyday food.

The Big Bucks: Organic Health Foods

The series is about both eating well AND spending less because let’s face it, spending less can be pretty easy: cheap food is abundant in heavily processed form. Sure it is possible to eat on a budget, but eat well?  And by well, I don’t mean filet mignon for Sunday dinner, I’m talking about providing our families with wholesome, healthy food. That is the goal of this series.
Robyn O’Brian has a fantastic TED talk where she partly highlights the need for us to reject processed foods and embrace the “real food” movement for the health of our children. It’s powerful stuff. If you haven’t watched the clip, I definitely recommend making it a priority. (My latest multi-tasking duo is folding laundry and listening to TED talks on YouTube.)
I think it’s fair to say that the more processed our food becomes, the lower the price drops.  The items that generally increase my grocery bill are the ones that are best for me: organic products, made with real ingredients, that have been treated with respect. Because I care about what I serve my children and I put into my own body, I pay a higher price for organic or natural products – unless I can make them myself for less, which is often the case.
Why pay $4 for a container of organic chicken broth when I’ve got the carcasses from last night’s dinner that I can simmer down to make fresh stock? Why get gouged $6 for a small bag of granola when I can get the raw oats for $1 and make my own with the kids after school?
Not only is it cheaper to make your own real food staples, you know exactly what is going into your food. You can customize each item- be it a condiment, salad dressing or spread -  to suit your family’s needs, avoid allergens and cater to taste preferences.

Homemade Substitutes for Grocery Staples: Important Factors to Remember

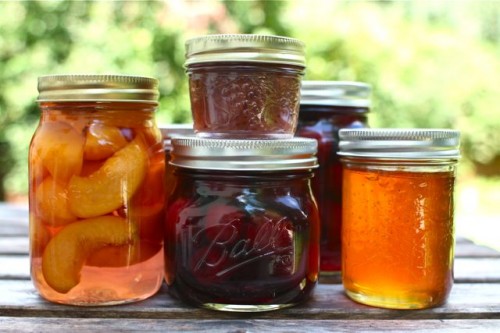
  • Food should be purchased and preserved in season. This is the best way to save money. Example: stock the pantry with canned tomatoes in September when they are practically giving them away.
  • Ingredients should be purchased in bulk when possible. The advantage is a reduced unit price. Go in on big purchases with a friend, if needed.
  • Set aside a realistic amount of time to make your homemade grocery staples. Accept that it is going to require some time, and remember that you will get faster as you gain experience. Team up with a friend on major canning projects and organize preserve swaps to gain a varied selection.
  • Start small. Don’t attempt everything on the list below or you may become overwhelmed and give up. Instead, start with two staples such as one salad dressing and one pancake syrup. Once you are making these regularly, add two more items, and so on.

Pantry Staples from Scratch

If you think about it, many basic ingredients and foods that we consume daily or weekly can be made from scratch for much less than it costs to buy prepared. As described above, smart shopping by buying in bulk and in season can also dramatically increase savings.
I can honestly say that, with the exception of ketchup and dill pickles (which I intend to attempt this summer) I make all of the following kitchen staples from scratch. And you know what? It doesn’t seem like such a big deal. Maybe because it’s become a way of life for me; a conscious choice. I know why I can my own food, I understand the importance of healthy food culture, and I’m not afraid to roll up my sleeves and put in some long hours in the kitchen to benefit my family – and save some coin in the process.
I hope you are encouraged to do the same.

Creamy Homemade Ricotta

DSC05360-1
I first tasted homemade ricotta about 10 years ago. It was quite revelatory. Creamy, almost buttery, bits of cheese, full of flavor that melt in your mouth. Nothing at all like the watery stuff I grew up eating off supermarket shelves. I hadn't given much thought to making it myself until just recently—like last Thursday. Truth be told, I can't remember if I'm coming or going these days, so I couldn't tell you what brought on the urge exactly. I just remember waking up thinking I want to make ricotta. This is here Google comes in real handy. Imagine how much quicker we would've evolved if cavemen could've googled "how to make fire"?
Anywho, a quick search showed a few variations in ingredients, but the basic chemical reaction (curdling the milk) required two things: milk and an acid. Some recipes called for lemon, others white vinegar. The one that struck me was Heidi Swanson's over at 101 Cookbooks. Her's called for buttermilk, and it was really genius. Buttermilk naturally contains lactic acid.

While Heidi's recipe was simply buttermilk and whole milk, I liked David Lebovitz's use of cream. I had a hunch it would produce that buttery flavor I was looking for, so I scaled back some of the milk to add it. Not only was I incredibly happy with the outcome, I also learned it's ridiculously easy to make from scratch. Now I don't have to worry that my favorite Italian shops are closed on Sunday or Monday. I can enjoy homemade ricotta all the time. Another perk is eating it still warm from the colander—topped with some homemade strawberry or tomato jam. Next time I'm going to make it with the kids as a tasty science lesson.
DSC05367-1

Creamy Homemade Ricotta
makes about 2 cups plus a few spoonfuls for taste testing
Keep in mind the ricotta will thicken in the fridge, so don't drain it too much, or it'll end up dry and cakey. I also like to let it come to room temperature before serving.

4 cups whole milk
1 cup heavy cream
3/4 cup buttermilk
1/2 teaspoon salt

Add ingredients to a 4-quart pot. Bring to a gentle boil over medium heat. Meanwhile, line a sieve or fine mesh strainer with a few layers of cheesecloth and place it over a deep bowl or pot.
DSC05324-1

Once curds begin to separate from the whey (liquid temperature will be between 175º and 200º), remove from heat. Gently spoon or ladle the curds into the cheesecloth-lined strainer. You may need to gently gather the cheesecloth at the top to help the curds drain.
DSC05327-1
DSC05331-1

DSC05341-1
Let curds sit in cheesecloth to drain liquid 15 to 30 minutes, depending on how creamy you'd like your ricotta. Store in refrigerator up to two days.

Thirty Minute Mozzarella

All photos by Andrew Wilder

Recipe: Thirty Minute Mozzarella

You can probably find citric acid at a good grocery store, but rennet is harder to come by.  You can order it online at several retailers; I’ve purchased it fromNew England Cheesemaking Supply and Grape and Granary.
You can also just get one of Ricki’s Mozzarella and Ricotta Cheese Making Kit, which have everything you need, including a dairy thermometer.
I prefer to use liquid vegetarian rennet, which New England Cheesemaking Supply sells at double-strength, so I use 1/8 tsp. for this recipe.
Ingredients
  • 1 gallon Milk, not ultra-pasteurized
  • 1 1/2 tsp. Citric Acid powder, dissolved in 1/4 cup room-temperature water
  • 1/4 tsp. Liquid Rennet or 1/2 tablet Rennet, dissolved in 1/4 cup room-temperature water
  • 1 tsp. Cheese (Flake) Salt or Kosher Salt
Instructions
1. Pour the milk in to a large pot.  On medium-low, heat slowly to 55 degrees Fahrenheit.  Stir slowly and continuously to keep from scalding.
2. Once the milk reaches 55 degrees, pour in the citric acid mixture and stir well. Keep heating.
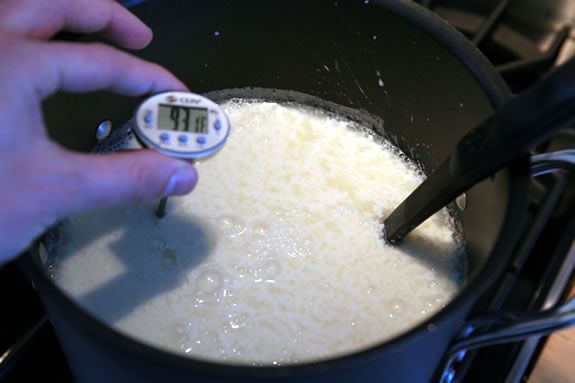
3.  When the milk hits 88 degrees, add the rennet mixture and stir well.  Right around this time the milk will start to thicken, and you’ll see little white flecks stick to your spoon as it starts curdling.
4. Once the milk is in the 90-degree range, it should be noticeably curdled.  Stir very gently at this point, if at all — you want to encourage the curds to knit together.
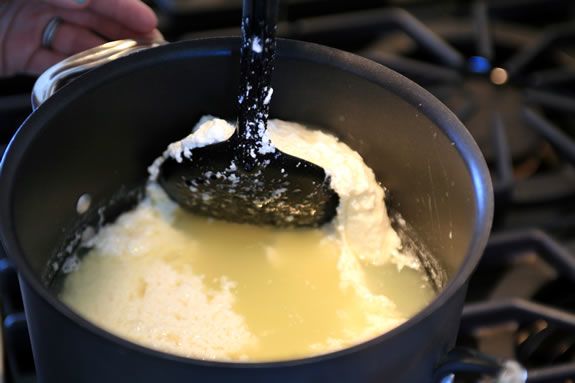
5. Between 95 and 105 degrees, the curds will be quite thick. Turn off the heat once they start separating from the sides of the pot, and there’s a very clear distinction between the curds (white clumps) and whey (yellow liquid).
6. Let the curds rest for 5 minutes.
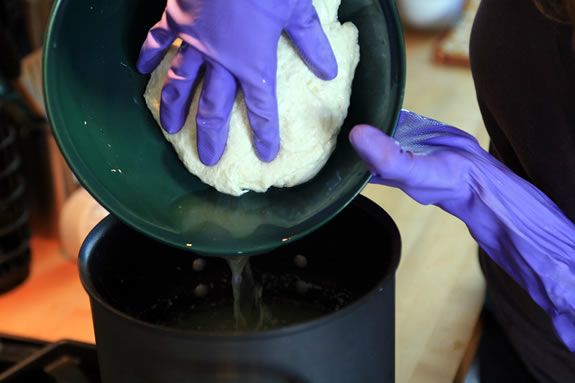
7. With a perforated or slotted spoon, ladle the curds into a bowl.  The curds will continue expelling whey once they’re in the bowl, which is fine.  Once you have pulled most of the curds out of the pot (some little bits will probably still be floating about), pour any excess whey back in the pot.
8. Using a microwave, heat the curds for 60 seconds.  Drain off any excess whey, then fold the curds over once, then once again.  This is to distribute the heat evenly.
9. Microwave again for about 30-40 seconds, depending on the strength of your microwave.  Pour off the whey.
10. Sprinkle the salt onto the cheese, and then fold the curds over twice again.  Put them back into the microwave for another 30-40 seconds.  Pour of any excess whey.
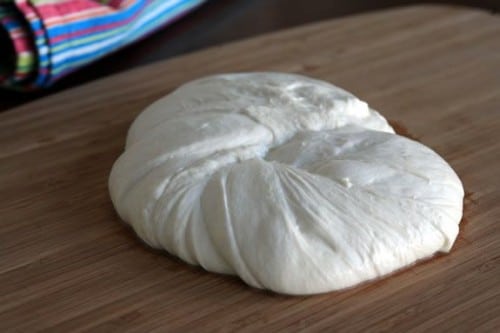
11. At this point, the cheese should be very hot, and look like melted mozzarella!
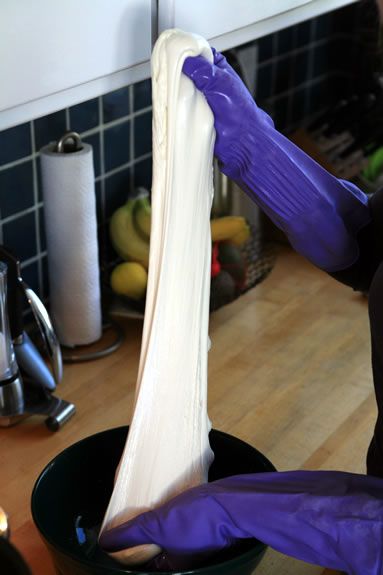
12.  Stretch the cheese, and then fold it back on itself. If it tears when you try to stretch it, the cheese is not hot enough; just repeat the microwaving process. Stretch it again once or twice. If you want a more string-cheese like cheese, do it a few more times.
13. You can then twist or braid the cheese, or tear off pieces and roll them into small balls.  If you’re going to refrigerate the cheese for later, drop it in a bowl of ice water to get the temperature down quickly. Otherwise, just dig in while it’s still warm!
Editor’s note: Don’t toss that whey! You can use it in pancakes or crepes.
 

The Colorful Mama Copyright © 2011 Designed by Ipietoon Blogger Template and web hosting