The following is a guest post from Marisa of Food in Jars. Welcome, Marisa!
Canned tomatoes are a pantry staple. However for most of us, our tomatoes come in cans from the grocery store. For a moment though, imagine what it would be like to have a pantry lined with sparkling glass jars, filled with home canned tomatoes.
It’s far easier than you might think!
WHAT YOU’LL NEED FOR FOUR QUARTS OF TOMATOES:
- A large stockpot (for processing the jars)
- A small, round rack (to keep the jars off the bottom of the pot)
- A smaller pot (for blanching the tomatoes)
- A tiny saucepan for simmering lids
- A kettle for boiling water
- 4 clean quart jars, new lids and rings
- A paring knife
- Jarred lemon juice
- A tablespoon measure
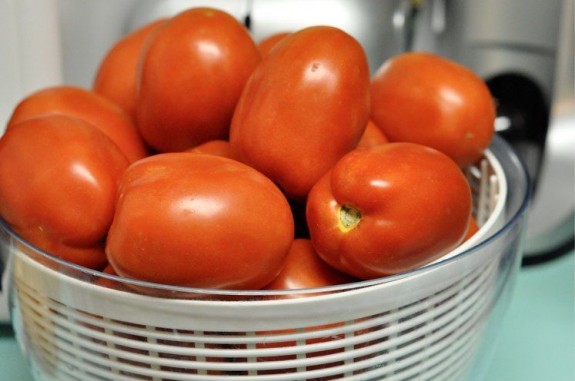
- 25 Roma tomatoes
- Boiling water
HOW TO CAN TOMATOES:
1. Place the rack in the bottom of your stockpot. Make sure to choose a pot that will allow the jars to be submerged with at least one inch of water above them and some room still at the top of the pot to allow for boiling.
2. Fill the pot with water and begin to bring to a boil.
3. Fill your smaller blanching pot with water and bring to a boil.
4. Fill the kettle with water and bring to a boil (yes, there’s lots of water boiling in canning).
5. Place lids in the smallest pot and bring to a very low simmer.
2. Fill the pot with water and begin to bring to a boil.
3. Fill your smaller blanching pot with water and bring to a boil.
4. Fill the kettle with water and bring to a boil (yes, there’s lots of water boiling in canning).
5. Place lids in the smallest pot and bring to a very low simmer.
 All photos by Marisa McClellan
6. While waiting for the blanching water to boil, remove the cores from the tomatoes and carve a small cross into bottoms of the tomatoes, to make them easier to peel post blanching.
7. Once the smaller pot of water has come a boil, blanch the tomatoes in batches of 3 or 4 (keep the batches small so that you don’t drop the water temperature too drastically) for 1-2 minutes. Use a slotted spoon to remove the tomatoes from the blanching water.
8. When tomatoes are cool enough to handle, peel them. You should be able to do this with your hands, but keep that paring knife close for the troublesome spots.
9. Once you have 6 peeled tomatoes, you can fill a jar. If you’re using regular mouthed jars, keep a wooden spoon around, to help you pack the tomatoes into the jars. You should be able to get 5-6 tomatoes into each jar without too much squishing. We’re making whole tomatoes in water here, so do your best not to smash them too much.
10. Keep peeling and filling jars, until you have four filled jars lined up on your countertop.

11. Add two tablespoons of lemon juice to each jar.
12. Top each jar off with the boiling water from the kettle, leaving ½ inch of headspace in each jar.
13. Using the end of your wooden spoon, remove any air bubbles from inside the jars. Add a bit more water if necessary.
14. Using a clean kitchen towel or a bit of paper towel, wipe down the rims of the jars.
15. Place lids on the jars and apply the rings to the jars (don’t tighten those rings too much).
16. Using jar lifters or tongs (take care when using tongs, it’s easy to give yourself a boiling water burn with them), gently lower the jars into the canning pot. You may need to remove some water, a 2-cup pyrex measuring cup does this task well.
17. Once all the jars are in the processing pot, put a lid on it and bring it back up to a boil. Adjust the burner temperature to keep the pot boiling gently.Process for 45 minutes.
18. When the time is up, remove the jars from the pot. Place them on a towel-lined countertop and allow them to cool. The lids should audibly ping as they seal.
Once the jars are completely cool, remove the rings and test the seal by gently tapping the lid. It should hold tight and be concave.
And you’re done! Four quarts of gorgeous, home canned tomatoes are ready for your pantry shelves.
If whole canned tomatoes aren’t really your thing, that doesn’t mean you should rule out home canned tomatoes entirely. Consider salsa, sauce or juice for a start.
Happy canning!
Questions? Pointers? Feel free to discuss in the comments section below.

0 comments:
Post a Comment